Transition Preset Base Pack

watch these 10 presets
So I hope you like this video this is uncle paddy and welcome back to my channel so today we’re gonna be learning how you can apply all these effects in Alight Motion, and I’m gonna give away all these presets for free so you can download the link is in the description once you download these preset extract the zip folder and go to the preset and import presets and you will see if I like this ten free smooth transition pack on kepada films

Movie Frames:
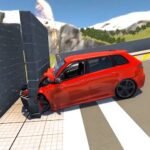
So just click open I already got it so I’m just gonna search you’re on kit and these are all the presets so let’s start with the first video as you can see that in the first video the motion is going downward, so we can apply this slide down effect here as you can see that this effect is of 20 frames so we can zoom in and cut the 20 frames now read the description here 10 frames left and 10 frames right so we’re gonna go 10 frames, left using the shift and the left arrow key twice and click ctrl K shift arrow key twice and shift right arrow key twice hit ctrl K so these are 20 frames now in the effect see that 20 frames on adjustment layer.
okay so we’re gonna apply this effect on the edges mid layer for that we will create the adjustment layer, just right click new item adjustment layer click OK drag this adjustment layer and cut here so this is the 20 frames adjustment layer and apply the effect on the 20 frame.
Layer Adjustment:
I’m gonna apply the zoom in effect here as you can see that this is the 12 frames 6 frames on the left and the 6 frames on the right on the adjustments, so just 5 frames on the left and then 1 frame on the left click ctrl K and shift right arrow key 5 frames and one frame again using the right arrow key click ctrl key and drag this adjustment layer again so this is our 12 frames effect now apply the zoom in for the 12 frame and the one thing to note here is that this base preset will not be applied on the left side here only on the right side as you can see in the description, as well for zoom in apply only on the right video and for zoom out apply only on the left video so apply this bass preset only on the right video for zooming in anytime.
Applying Effects:
You just don’t need to remember this you just need to see that in the base we set here so this is I was zooming in effect, I’m just gonna play this for you same for the zoom out this is my left video and this is my right video just click shift left arrow key and one arrow key hit ctrl K and go for six frames one two three four five six apply the adjustment layer here, and cut it this is our adjustment layer applied the zoom out effect on adjustment layer and apply the piece preset, only on the Left video so this is our effect zoom out effect now you can apply this effect on any video but just see that the motion should be going in that direction for example if your video is going in the right direction apply, the right effect your video is going in the left direction applied the left effect.
So guys,I hope you like this tutorial and if you like this then please hit a like button and subscribe to my channel and I’m gonna see you in my next video till then take care bye.